How Do I Stay Dry in a Hammock?
Just Jeff's Outdoors Page"Going to the woods is going home, for I suppose we came from the woods originally." ~John Muir |
|
|
| Introduction. |
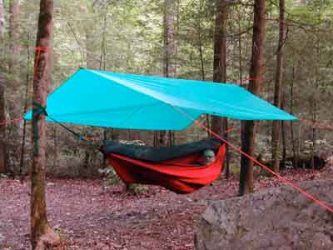
Staying dry in a hammock is probably easier than in a tent or tarp because you don't have to worry about hard-packed campsites with poor drainage, dished tentsites, runoff soaking your groundcloth, or digging drainage trenches. Most people simply hang a tarp over their hammock and get all the advantages of normal tarp camping - excellent ventilation, better views, etc. Other ideas include bivies and hanging in shelters.
And the details...
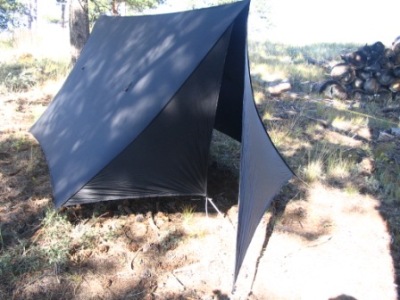
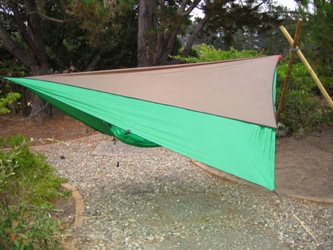
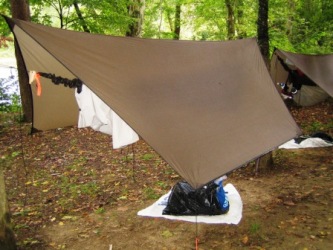
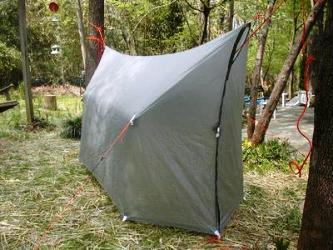
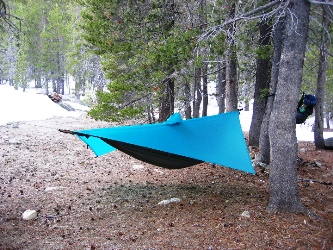
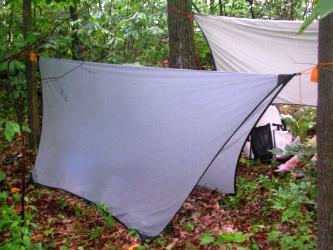
MacCat at Winnemucca
Trip Report
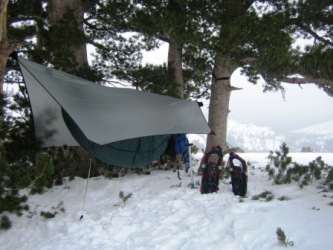
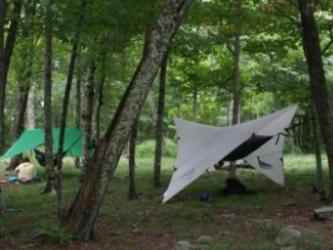
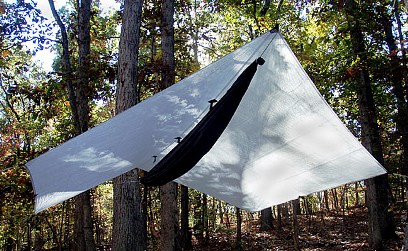
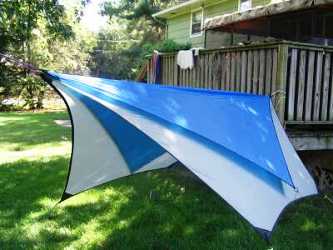
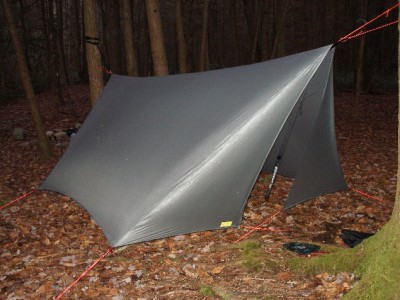
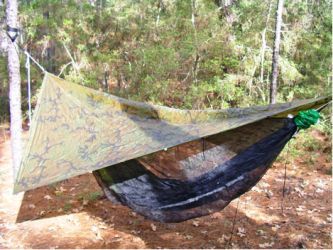
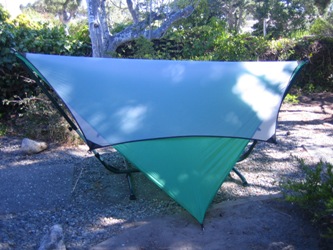
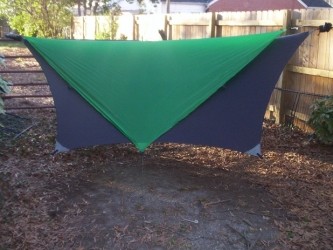
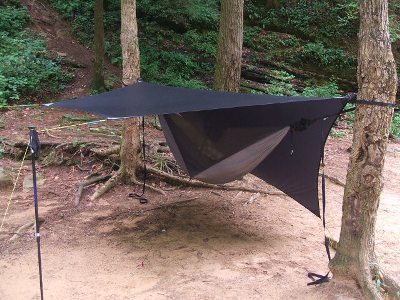
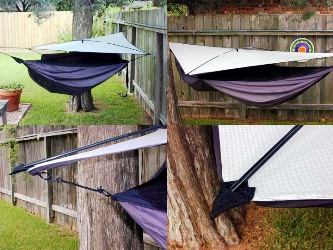
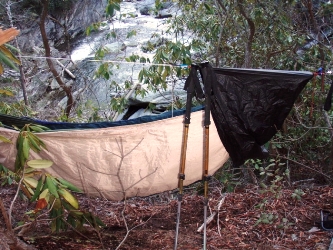
Warbonnet SuperFly in Storm Mode
(pic credit)
| Choosing a Tarp: Size |
For something so simple, tarps actually present several options. When choosing a tarp, a hammocker must consider simple things like size, shape, weight, and price; but there are several other considerations as well. What size would you like? Will you use beaks? How about tensioners and drip strings? Will you attach it to the Hennessy connectors or directly to the tree? I'll discuss each of these below.
Size
There are two competing considerations when choosing what size tarp to carry - weight/bulk versus coverage. Given the same material, obviously a smaller tarp will weigh less and take up less space in the pack. It will also provide less protection against windblown rain, less of a windblock against cold winter winds, and better views and better ventilation. Proper site selection can alleviate much of this concern, though. Larger tarps, often referred to as "winter tarps" because they're often carried only in the colder months, offer the opposite - more coverage means less concern about site selection, more protection from wind and windblown rain, etc. They also restrict the view from the hammock, and the increased protection can also restrict ventilation, introducing condensation concerns. Another advantage to larger tarps is that a ground dweller can share the hammocker's tarp is the site is level enough.
Which size to choose is dependent entirely on the hammocker. Many folks decide to carry a smaller tarp in the summer - like the stock Hennessy flies, the JRB 8'x8', or the MacCat Standard - and then carry larger tarps (or even tarptents) in the winter - like the Speer and JRB Winter Tarps, the JRB Hammock Hut, or the Warbonnet Superfly.
At a minimum, the tarp must be long enough to cover the hammock along the ridgeline and wide enough to cover the sides. Generally, you'll need at least 9'x5' minimum...some are smaller, but that's pushing it in my opinion. The stock fly on the HennessyBackpacker Ultralight Asym is about 120"x80". Some of the common larger sizes include the Hennessy Hex Flies at 144"x132" and 144"x120", the Speer 8'x10' and 10'x11' Winter Tarp, and the JacksRBetter 10'x11' Cat Tarp.
| Choosing a Tarp: Shape |
The main shapes for tarps are rectangle, diamond or square, hex, and catenary versions. Each tarp has advantages and disadvantages over the others.
A rectangular tarp generally protects the hammock ends better, especially from wind-blown rain, provides more living space underneath, and can provide a better windblock. They generally weigh more than a square tarp that's big enough to cover the hammock, and require four stakes (plus the two ridgeline supports...usually the same trees you hung the hammock from).
Ed Speer's 8'x10' Rectangle
(Pic by Ed Speer)
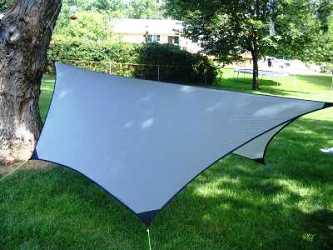
A square tarp, usually pitched diagonally as a diamond, offers better views out the ends, better ventilation and lighter weight. It also only needs two stakes, so it's easier to pitch and saves some more weight over the rectangular tarps.
JacksRBetter 8'x8' Square Tarp
JRB 8x8 and HH BULA
Kelty Noah 9'x9' Tarp
(pic credit)
The JRB and MacCat seem to be the most talked-about hammock tarps on the internet, probably because of their coverage/weight ratio. But Neo from Whiteblaze has folks talking about the Gear Guide 9'x9' and 12'x12' urethane coated tarps. It's several ounces heavier than comparably sized tarps, but it's also about half the price! And it comes in camo for you soldier of fortune types, like Neo.
Neo's Woodland Camo Gear Guide Tarp
(pic credit)
Neo's Digital Camo Gear Guide Tarp
Photo from (pic credit)
A hex tarp is basically a rectangle with the corners removed. It tries to combine the coverage advantage of the rectangle with the ligher weight of a square tarp; it uses less material at the "corners" so it saves weight, and removing the corners also provides better views and ventilation. It still gives more dry living space and better end protection than a square tarp, and it doesn't have to be a true hex shape...it can be as long or short as you want to make it. The most popular commercial hex tarp is the Hennessy line. Mountain Laurel Designs makes a Spectralite 10.7' x 8' hex tarp that weighs as little as 6.4 oz if you're willing to pay for it! They also have silnylon version for cheaper. Like rectangle tarps, need four stakes for a hex tarp.
Gary's Hennessy Hex Tarp
At SEHHA Sept 06
MLD Hex Hammock Tarp
Photo by MLD
Catenary tarps utilize curved seams to reduce the extra material in a tarp that causes it to sag and flap in the wind. Basically, think of a rectangle, then draw a slight curve along the long edges, and remove the material inside the curve. Catenary hex tarps usually also have "cat cuts" along the short edges. If only the tarp's permiter has catenary cuts, there is no "optimum pitch angle" that catenary ridgelines cause, so the tarp is still useful on the ground.
Brian MacMillin sells the popular MacCat tarp and Warbonnet Outdoors sells the SuperFly. The Speer and JRB Winter Tarps also use catenary cuts between the tie-outs to get a nice taut pitch.
Creekfisher's MacCat Catenary Tarp
Originally on Yahoo Hammockcamping
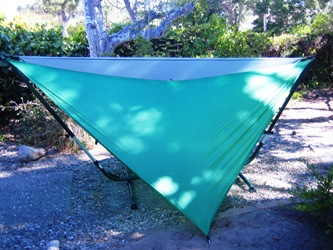
Warbonnet SuperFly
(pic credit)
MacCat Tarp vs stock Hennessy (Non-Asym)
Pic by Outdoor Equipment Supplier
Youngblood's Homemade Cat Tarp
Photo by Youngblood
| Choosing a Tarp: Beaks and Doors. |
Some users get creative with size and shape to create new types of hammock shelters. On a hammock tarp, the most likely place for windblown rain to get you wet is at the ends. The ends are even more vulnerable on diamond and square tarps.
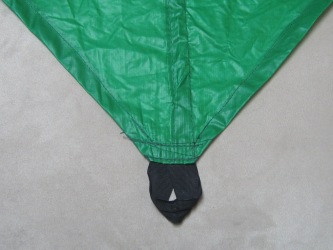
One answer is to put some kind of cap over the end of the hammock. This works like a beak for a ground tarp, but it's a little different for hammockers. Ray Garlington has a good design on his Silk Hammock page...he calls them "Tarp Hoods." T-BACK did the same thing on his MacCat tarp, and started a Hammock Forums thread about it. The vents at the peak are adjustable for different weather conditions, and the beaks roll up to the sides when they're not needed.
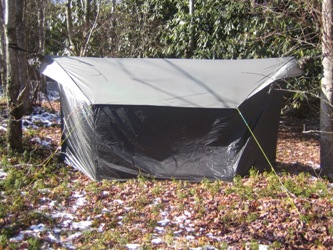
As of Jan 09, the Warbonnet SuperFly is the only commercial tarp that puts doors on a standard catenary tarp...they fold back for warm weather and "close" when you need more protection. Tarps with end caps and doors are very similar to tarptents and winter tarps.
Ray's Tarp Hoods seen from inside
Pic by Ray Garlington
T-BACK's MacCat Beaks
Photo by T-BACK
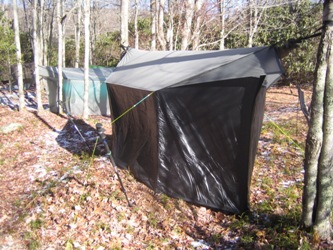
Warbonnet SuperFly in Storm Mode
(pic credit)
| Tarptents and Winter Tarps. |
Youngblood created a "hammock tarptent" that's large enough to completely close up for cold or extremely windy and rainy weather. This one is 130"x120". Then he simplified his design and created the Speer Winter Tarp, pictured below, which can be purchased from Speer Hammocks.
Youngblood's Tarptent
Pic by Youngblood

Youngblood's Tarptent
Pic by Youngblood
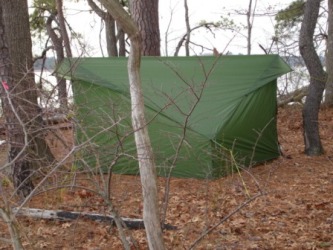
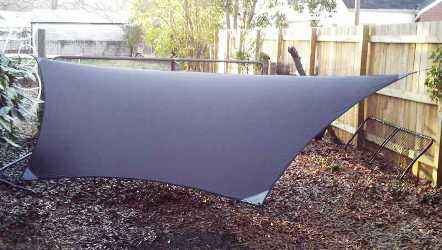
Bearpaw's Speer Winter Tarp
(pic credit)
JacksRBetter jumped into the winter tarp and tarptent line with a Hammock Hut and a 10'x11' winter tarp with cat cut edges. The Hammock Hut is basically their 8'x8' with walls sewn on, but they also prototyped a longer version that they displayed at the Hammock Forums Winter Hangout at Mt Rogers in January 2007.
JRB Hammock Hut
Pic by JRB
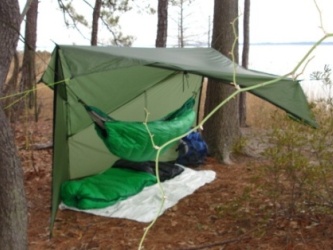
JRB Hammock Hut
Pic by JRB
JRB 11'x10' Pitched as Baker Hut
Pic by JRB
JRB 11'x10' w/ Closed Ends
Pic by JRB
JRB Tarptent Prototype v.3
Mt Rogers, Jan 2007
JRB Tarptent Prototype v.3
Mt Rogers, Jan 2007
| Multi-Use |
In the quest to reduce packweight, hikers look for multi-use items. Ponchos have been used for years as shelters, and a weight-conscious hiker can save about a pound by using his raingear over his hammock and leaving the tarp at home. Obviously, this can have disadvantages under certain circumstances (like setting up in the rain and possibly sacrificing some coverage), but for some hikers the weight saved is worth the extra caution needed.
Integral Designs Poncho Over a Hennessy
Pic by Steve N.
Equinox Poncho over hammock inside Snakeskins
Pic by Eric on Yahoo Hammockcamping
Vick's poncho has a double-casing neck instead of a hood...when set up as a tarp, the casing flops over so rain cannot come in.
Vick's Poncho Tarp
Pic by Vick
Closeup of Double-Casing Neck
Pic by Vick
| Where Do I Buy a Hammock Tarp? |
NOTE: This section is very dated, and there are a lot more cottage tarp makers than when I first made the table below. I will update it soon, but it won't be an exhaustive list of hammock tarp makers.
Most camping stores sell some sort of tarp, so check out your local outfitter or stores like REI. Check online and eBay, too (search for silnylon or brand names). Better yet, support a startup, like Speer Hammocks, JacksRBetter, Outdoor Equipment Supplier, Warbonnet Outdoors, Mountain Laurel Designs, etc.
Here's a short list for comparison...prices may be dated but I'll leave them there for comparison. If you have a unique one to add, email me and I'll put it on.
| Tarp | Size | Material | Weight | Cost |
| Hennessy Hex | 144"x132" | Silnylon | 19 oz | $130 |
| Hennessy Hex | 144"x120" | PU Coated | 25 oz | $60 |
| Ed Speer's Tarp | 8'x10' | Silnylon | 13 oz | $100 |
| JacksRBetter* | 8'x8' | Silnylon cordura | 9.4 oz | $80 |
| MacCat Standard | 125"x84" | Silnylon | 12.5 oz | $95 |
| MacCat Deluxe | 130"x104" | Silnylon | 15.5 oz | $115 |
| MacCat Micro | 120"x62" | Silnylon | 7.4 oz | $65 |
| Integral Designs SilTarp2 | 8'x10' | Silnylon | 14 oz | $135 |
| Integral Designs SilPoncho* | 8'x5' | Silnylon | 10 oz | $75 |
| Campmor* | 6'x8' | Silnylon | 9.2 oz | $55 |
| Campmor | 8'x10' | Silnylon | 13 oz | $65 |
| Gear Guide | 9'x9' | Urethane Coated | 24 oz | $30 |
| Gear Guide | 12'x12' | Urethane Coated | 31 oz | $40 |
*Pitch diagonally
| Comparison: JRB 8x8 vs MacCat Standard |
I've been using my JRB 8x8 since I got it, and I'm very happy with it. When I asked Brian from Outdoor Equipment Supplier to use a picture from his page on mine, he offered to send me a tarp to test so I could review it. This is the beginning of what will eventually turn into a full review...
UPDATE: See my MacCat BGT Review and Test Details.
 |
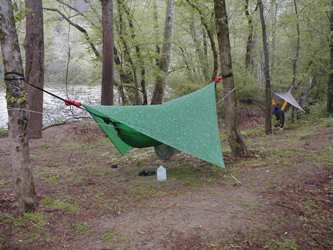 |
Photo from OES Website |
Hot Springs, NC |
| Tarp | Size | Material | Listed Weight | Measured Weight | Cost |
| MacCat Standard | 125"x84" | Silnylon | 12.5 oz (354 g) | 13.5 oz (382 g) | $95 |
| JacksRBetter | 8'x8' | Silnylon cordura | 9.4 oz (266 g) | 10.25 oz (290 g) | $80 |
Shape. The major difference between the tarps is the shape. The JRB is a square, pitched diagonally, so you only need two stakes (and cord) to set it up. The MacCat is a hex with a straight ridgeline and catenary sides. This shape removes the extra material that causes rectangular tarps to sag and flap in the wind, resulting in a MacCat that's very easy to get a nice tight pitch. Since the ridgeline is straight, the tarp doesn't have an "optimal pitch angle" that catenary ridgelines can cause, which means more flexibility for the user while maintaining the advantages of the cat cut.
Another major impact of the shape is that the MacCat requires four stakes with cord rather than the two for the JRB. This adds a bit to the weight and increases setup time. In some cases, it may reduce campsite options.
In the beginning, I thought the MacCat would provide better protection on the ends, which is the only place I've experienced any problems with windblown rain in a hammock. After setting them up together, though, I'm not sure that's the case. The JRB is about 2" longer on the ridgeline, and that seems to make up for the difference. You can see in the picture below that the MacCat is pretty far away from the hammock before the coverage increases. I think this will provide more useful coverage under the tarp (vs the corners of the JRB, which is really too small to use for anything), but not necessarily better end protection. I'll test this more when Monterey gets it rainy season!
Guyline Connectors. Another big difference is the guyline connections. JRB uses nylon loops...very light and functional. I just use a clove hitch for my guylines and it attaches perfectly. The MacCat uses thicker webbing to attach plastic D-rings to the tarp. A clove hitch still provides enough friction to hold the guylines to the tarp. I think the D-rings will be more durable than the JRB's nylon, but after more than a year of use I haven't noticed any significant wear on the JRB's loops. Again, I'm not sure the extra weight is needed, but it's probably only a few grams difference. I'm NOT going to take apart the tarps to measure it!

Guyline Connectors: MacCat Standard
Guyline Connectors: JRB 8x8
Headroom and Ventilation. This is a major advantage of the MacCat over the JRB. The JRB uses the diagonal shape to approximate a cat cut, and it works well. When I set it up tight, the corner tie-outs pull the tarp down in the middle, approximating the catenary and reducing extra flapping material. However, I can't really get a tight pitch without pulling the center down, which really reduces headroom inside. I didn't notice this made much of a difference until I took the picture below. The MacCat sits about 7" higher in the middle than the JRB when pitched for approximately the same type of coverage. Extended along the rest of the ridgeline, this makes quite a difference in how big the tarp "feels" inside.
When I use my homemade Speer-types, I often brush my back on the underside of the JRB because it sits so low, but pitching it higher would decrease the coverage. The MacCat makes it easier to get in and out without brushing the tarp...especially useful when condensation is on the underside of the tarp. I think the extra space will also improve ventilation, which will further decrease condensation.
JRB 8x8 under MacCat Standard
Note the difference in headroom
Interim Conclusions. In sum, both of these tarps are very light, high quality pieces of gear. The JRB is a bit lighter,* but the MacCat appears more durable. The JRB is easier to pitch, but the MacCat seems to provide more usable space inside and be more comfortable overall.
Which would I choose if forced to bring only one? I can't say at this point...they're both awesome, and I need more testing to decide. Keep in mind, this is only a preliminary report...I'll keep updating as I get more field use with the MacCat.
UPDATE: I used the MacCat on my Ten Lakes trip in Yosemite. It seemed to cut the wind better than the JRB, but it wasn't very windy so I don't want to be too hasty in drawing that conclusion. I certainly noticed the extra space, though tying the two extra guylines added a bit to the time and hassle-factor. I was fully satisfied with the MacCat on this trip!
See the Ten Lakes Pictures and Cold Weather Test for more details of the trip.
| Do-It-Yourself Hammock Tarps |
A basic rectangular tarp is pretty easy to make...if you can make a straight seam on silnylon, you can make a tarp. Ed Speer has simple directions in his Hammock Camping book, and a rectangular hammock tarp is basically the same thing as in Ray Jardine's Beyond Backpacking.
Blackbishop made a great catenary hex tarp based on the MacCat and posted very clear directions online so you can make your own. Here's a .pdf file of the BlackCat DIY Instructions. Use Adobe Acrobat to view the file. It also has pictures of him using a cat tarp on the ground.
FanaticFringer's BlackCat
Pic by Blackbishop
BlackCat (~14 oz) vs JRB (~10 oz)
Pic by Blackbishop

DIY Catenary Tarp
Pic by Hammock Engineer
One great thing about DIY gear is that you can make it to address your own needs, and you get things that aren't made commercially yet. GrizzlyAdams wanted more room for his bridge hammock, so he made the quonset hut pictured below. Hammock tarps didn't have doors until some DIYers added them to existing tarps...now you can get the Warbonnet SuperFly and the JRB Hammock Hut, and a few winter tarps that approximate the end coverage of doors when pitched right.
GrizzlyAdam's Quonset Hut at Mt Rogers
(pic credit)
| How Do I Pitch a Hammock Tarp? |
The Speer 8x10 has a horizontally-sewn ridgeline, which runs perpendicular to the hammock's centerline. That keeps the 10' section in line with the tarp.
The JRB 8x8 has a diagonal ridgeline from one corner to the other. It doesn't really matter which way you put it. The Jacks put theirs in line with the hammock, but I like to put mine perpendicular. Both work just fine...I just find that with my setup it stays a bit tighter that way.
If you're using a smaller rectangular tarp or a poncho, it'll effectively become an A-Sym fly. If you're in an HH, just make sure the short side of the poncho is in line with the A-Sym corner.
One important point to keep in mind is that your HH A-Sym fly has to be lined up correctly. If it's on "upside down" the A-sym corners won't line up and you won't have enough coverage where the side tie-outs connect. You'll usually notice that it doesn't fit right when you put it on...but if you don't, you'll figure it out when it rains! Just flip it over and it should fit right on.
The Hennesy Hammock is a great design with a minor flaw. When you attach the tarp to the hammock supports, it's nice and tight. When you sit in the hammock and it sags, the points where the tarp is attached become closer. When you decrease the distance between the secure points, the tarp sags. It's that easy. So how do you fix it?
Don't tie the tarp to the hammock supports, or use tarp tensioners as mentioned below. The JRB guys are pretty serious about this...it's kinda funny on whiteblaze.net or Sgt Rock's when people ask the same question over and over again (Why does my tarp sag when I get in?)...and they always give the same answer. I wonder why people don't read the archives before they ask questions.
The other big advantage to this is that you can set up your tarp before you take anything, even the hammock, out of your pack. You have a nice dry area to cook, set up camp, etc. Then when it's raining in the morning, you can pack everything up under the dry tarp, close your backpack, and take down the tarp last...just stick it in an outer pocket (you don't want a wet tarp in your bag anyway, right?
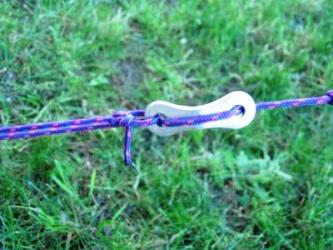
Brian MacMillin recommends using one HH tarp clip and tying the other end to the tree. That way you can adjust the tension as needed and the sagging effect is lessened.
*Some people don't have this problem...others say it happens every time.
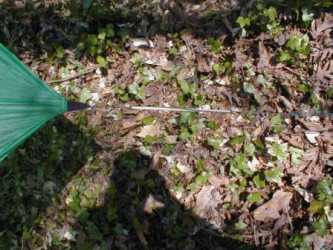
It doesn't seem to make sense, but it works. When you set up, the tarp should be very close to the hammock. For a Hennessy, you can set up with the ridgeline actually touching the tarp. When you get in, the hammock will sag and the tarp will stay where it is (because you tied it to the trees), so the tarp will end up right where it needs to be for stormy weather. The best way to do this is to make sure the tarp connects to the tree below where the hammock connects to the tree.
Tying the tarp to the tree above the hammock supports will work...you'll just have more space between the hammock and tarp. This is great for ventilation in nice weather and light rain, but it makes it easier for windblown rain to wet the hammock.
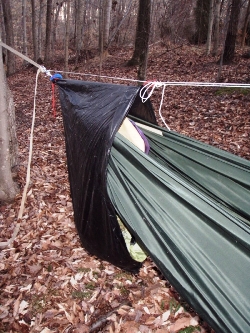
Tarp Tied Under the Tree Huggers
(It's still in the skins.)
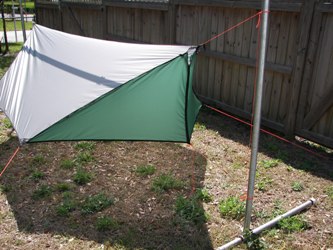
The angle of your tarp makes a big difference. For nice weather or for a sunshade, pitching it flat can increase ventilation and views. You can even angle it to catch the wind (see Site Selection paragraph on the Staying Warm page).
For stormy conditions, though, you'll want to pitch it low and steep...hugging the hammock, but with enough room for ventilation. Getting the tarp as low to the ground as possible can help, too...especially with the cold.
Pitched Low and Steep
Pic by Ed Speer
Pitched Low and Steep
Pic by Medicine Man
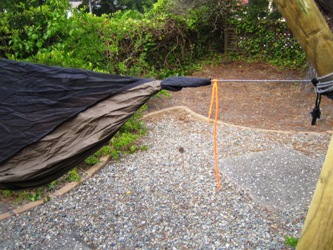
Using your hiking poles at the tarp corners can give you a more open living space. Just put your hiking pole right at the corner, then stake the guyline to the ground. The pole will keep the tarp raise up higher than it would be if you had just staked it down. Is that confusing? If you look closely, the Equinox poncho above has a pole holding up the left side. And at Mt Rogers, Blackbishop pitched the windward side nice and low, but opened up the leeward side with his hiking poles - that gives him more living space but maintained the good wind protection.
You can also tie the side guylines to trees or something else up high instead of staking them to the ground.
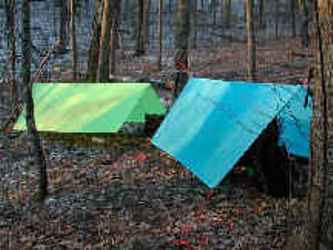
Blackbishop's BlackCat at Mt Rogers
Pic by Blackbishop
FanaticFringer's Cat Tarp
(pic credit)
Squeeze's Porch
(pic credit)
| Tarp Tricks for Hammocks. |
If you want to stay dry, a taut tarp is important. A tarp pulled smooth and taut will shed rain much better than one that is loose and flapping in the breeze. In the Hennessy with the stock fly, I have heard stories about water puddling along the edge, then a wind blows the tarp and dumps the water into the hammock. So keep a tight tarp!
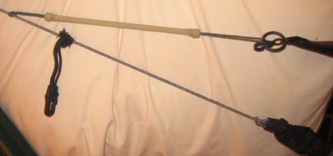
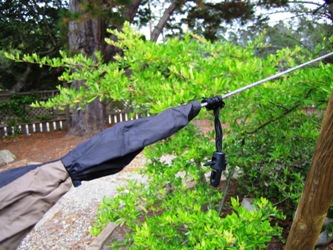
The problem is that tarps tend to sag overnight, so setting up your tarp correctly when you go to sleep doesn't mean it'll stay that way all night. What's the answer? Tarp Tensioners!
A tarp tensioner is just a piece of elastic material attached to the guylines that continually tightens the tarp as it begins to sag throughout the night. I make mine from Walmart slingshot tubing; others use various strengths of shockcord. There are also difference ways to connect (see pics below).
Besides maintaining the tension on the tarp, the elastic material can also protect your tarp from gusts. If you set the tensioner so it's not completely stretched, it will still have some elastic left to absorb the shock from a gust of wind. It's better for the elastic to absorb it than your tarp to rip! Incidentally, it's better for your tensioner or line to fail before your tarp fails and rips, too...field repairs on a piece of rope is pretty easy. If duct tape doesn't fix it, a failed tarp can ruin a trip!
One important note: Putting a stake at the end of a sling-shot can do some damage if it comes loose. A heavy wind gust, tripping over a guyline, or soil softening overnight due to rains, can cause the stake to come flying out of the ground. Be careful. I like to tie to exposed roots or to brush when I can. Otherwise, I try to put a rock or heavy branch on top of the stake to help secure it.
My Slingshot Tensioners
Directions Here
Improved Tarp Tensioners
Directions Here
Youngblood's Shockcord Tensioners
Pic by Youngblood
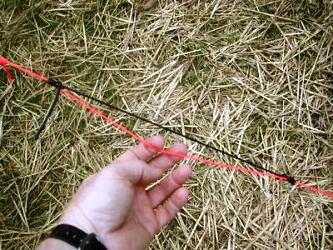
Jerry's Tarp Tensioners
Pic from Yahoo Hammockcamping
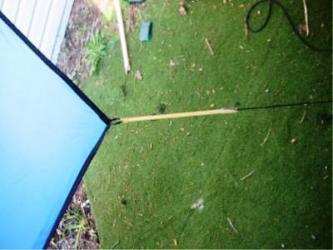
Marie Noelle from the Yahoo! Hammockcamping group used a tensioner from a tent on her tarp. It's different from the tensioners above - it doesn't take up the sag during the night or absorb wind gusts - but it makes it very easy to set up and make adjustments (like centering it over the hammock).
Marie-Noelle's Tensioner adapted from a tent
Pic in Yahoo Hammockcamping
Jack Krohn didn't like how the HH tie-outs restricted the hammock from swaying, and had a tough time making sure the fly gave proper coverage each time. To fix this problem, he added some 1" webbing loops to the fly's corners and stuck in a flexible tent pole to keep the fly spread wide. He attaches the HH tie-outs to the tarp's edges, and puts drip strings on the tie-outs next to the hammock to avoid any water running from the tarp into the hammock.
Jack used an old HH Non-Asym Expedition model, the stock fly, and the vestibule pole for his Wind River 4 tent.
For the weight penalty of a tent pole, he gets the advantage of never having to stake out the fly or hammock, of keeping the hammock spread the same width every time, and of being able to sway naturally without sacrificing inside space or tarp coverage.
Jack Krohn's setup
(pic credit)
Drip strings aren't really a tarp trick, but they can help keep the hammock dry. Here's how they work:
- Water runs down the tree, or the rain hits the hammock support ropes (or webbing), and continues to the lowest point.
- Unobstructed, the lowest point in a hammock is your butt...so you have to give the water a "new lowest point."
- Tie something porous onto the hammock support right next to where it attaches to the hammock and let one end hang down a few inches. Some people use cotton yarn; others use the socks they're already carrying in their packs.
- The water now runs down the support, onto the drip string, and drips onto the ground...instead of running down the support and into the hammock.
Shoestring as a Drip String
~1/2" from the hammock...not touching.
Hennessy Tarp Clip as Drip String
Tie the tarp to the tree.
| End Caps. |
Slowhike created End Caps that go on the hammock instead of on the tarp...not only do they protect the ends of the hammock, but his second version also provides a place to store gear. Easy to reach and the gear stays off the muddy ground. (Look inside the end cap, under the hammock, in the pic below.) He also adds a small gear hammock at the head end, inside the end cap, for flashlight, water, etc.
Add a drawstring and they can also be stuff sacks to store the hammock in...like a Blackbishop Sack, only bigger.
Slowhike's End Caps, Version 1
Pic by Slowhike

Small Gear Hammock in Storage End Caps
Pic by Slowhike
Slowhike's Storage End Caps
Pic by Slowhike
| Undercovers. |
Sometimes thick fog rolls in and soaks everything under the tarp, including the hammock, underquilts, and even the underside of the tarp itself. Other times, windblown rain and spray soaks the hammock and underquilt, especially near the foot end if a rectangular tarp is not used. However, using a waterproof undercover can help. A simple silnylon Garlington Taco can keep the fog off of the bottom-side insulation.
I reviewed the JRB Weathershield, which is a 100% waterproof, breathable undercover made from microporous polypropylene, like the Frogg Toggs material. Designed for the Hennessy Hammock and to protect the JRB underquilts, it can be used with no insulation, with your own insulation, or with the JRB quilts. It'll add 6-10F of warmth and keep the hammock and insulation dry. JRB also makes a Weathershield for a top quilt.
See the Hammock Camping Warm page for more details on undercovers.
JRB WeatherShield on a Hennessy
| Hammock Bivies. |
I've looked for other ways to stay dry without using a tarp. I like to sleep under the stars, but I don't want to risk my down bag getting wet when the bottom drops out of the sky before I can get my tarp up. Also, in some areas the fog rolls in sideways so you get wet under your tarp anyway. I made my Hammock Sock as a prototype hammock bivy...it's just DWR so it wets through pretty easily, but it keeps me warmer, too.
DebW made her hammock bivy out of Epic...it's waterproof/breathable and it looks awesome! I bet it keeps her warmer, but I'm not sure how waterproof the opening is. I first saw it on Whiteblaze.net in the hammock camping photos section, then I noticed it was in the Yahoo Group photos section, too.
DebW's Hammock Bivy
Pic by DebW
| A Note About Tying to a Shelter. |
A hammock exerts about 600lbs of force on each rope...that's a lot of force for a rickety old shelter to handle. If you're in a reinforced pavilion you'll probably be ok...just be careful in something like an AT shelter. Be especially careful if you tie off to any structural members...you might bring the whole shelter down! In the Files section of the Yahoo! Hammockcamping group, Youngblood has posted an Excel spreadsheet illustrating the forces a hammock support exerts. Basically, the support rope is the hypoteneus of a triangle. Using the angle of the hammock support to true horizontal, calculate the force on the support (h) by
| Site Selection. |
Just like staying warm, site selection is one of the most important factors in staying comfortable and dry in your hammock. Read the section in Staying Warm for details.
Top of Page | Site Map | Privacy Policy
© 2005 to Present | Email Me